Thursday, December 30, 2010

CEiMB: White Turkey Chili


This week's Craving Ellie in My Belly recipe was picked by Leslie of Lethally Delicious.  She chose for us to make the White Turkey Chili from from So Easy: Luscious, Healthy Recipes for Every Meal of the Week by Ellie Krieger.   This is an easy weeknight recipe that is light and fresh, which is good the week after lots and lots of Christmas indulgences.  

After looking at the recipe, I decided that I wanted my chili to be a bit heartier, so I halved all of the ingredients except for the turkey and the spices.  This made for a meatier chili with less beans, which is how I make chili normally, so I quite liked it.  I am also glad I kept the spices at that level as well, because without, the chili might have been less flavorful.  I added a jalapeno for a bit more spice, and instead of salt and pepper I used Goya Adobo with cumin, which is what I use for seasoning whenever I am cooking Mexican or Southwestern food.  I absolutely love it.  I used corn instead of hominy because that is what I had on hand.  I also would say it is imperative to add a splash of lime juice and fresh cilantro to your chili because it really brightens up the flavor.  Thanks Leslie for a great pick, I thought it was light, but comforting at the same time.  Be sure to check out the blogroll to see what the other CEiMB bloggers made.  

Saturday, December 18, 2010

Chocolate Mint Cookies


When I was shopping at my local grocery store the other day, I came across these Andes Creme de Menthe baking chips.  They are basically small pieces of those Andes chocolate mints you get after dinner at restaurants.  I wanted to find a chocolate cookie recipe where I could incorporate these chips, and I found this one, which sounded really good.

These cookies have a great mint flavor, and they taste a bit like Thin Mints, but thicker, so Thick Mints I guess.  Next time I make these I will probably dip them in chocolate, that would really make them great.  The batter was quite thick and the cookies seemed a bit dry, so dipping them in chocolate would be a great addition.   They were crisp, rich, yet refreshing cookies. Great for the holidays!


Ingredients:
  • 2 1/4 cups flour
  • 3/4 cup cocoa, sifted
  • 1/2 tsp. baking soda
  • 1/2 tsp. salt
  • 1/2  cup shortening
  • 1/2 cup unsalted butter, softened
  • 3/4 cup sugar
  • 3/4 cup dark brown sugar, firmly packed
  • 2 large eggs, beaten
  • 2 tsp. vanilla
  • 2 cup (1 - 10 oz. package) Andes Crème de Menthe Baking Chips
  • 1 cup powdered sugar
Directions:

Pre-heat oven to 350 degrees.  Sift the flour, cocoa, baking soda and salt together into a bowl and set aside.  With a hand held or standing mixer, beat together the shortening and butter until creamy. Add the sugars and continue beating until light and fluffy. Add the eggs and vanilla and beat until thoroughly incorporated. Add the flour mixture and blend until smooth. Fold in Andes Crème de Menthe Baking Chips.

Roll the dough, by hand, into a 1 1/2 inch balls. Roll the balls in the powdered sugar to fully cover ball. Flatten the balls gently into 1/2 inch thick disks and place about 2 inches apart, spacing them evenly on ungreased baking sheets. Bake cookies at 350 degrees for 10-12 minutes. Remove from oven and let cookies set 1 minute on baking sheet. Remove from sheet and move to wire rack to cool completely.


Thursday, December 9, 2010

CEiMB: Beef Stroganoff with Green Beans and Grainy Mustard


This week's Craving Ellie in My Belly is from Liz of The Not So Skinny Kitchen.  She chose for us to make the Beef Stroganoff recipe from from So Easy: Luscious, Healthy Recipes for Every Meal of the Week by Ellie Krieger.  It's a pretty straightforward beef stroganoff recipe in which beef is simmered in red wine and beef broth with mushrooms and onions.  At the last minute, I added some light sour cream to the gravy.  The original recipe called for some nonfat Greek yogurt, but I like the flavor and tang that the sour cream adds to the dish. The beef stroganoff is served over some egg noodles with a side of steamed green beans that have been tossed in some grainy mustard and seasoned with salt and pepper.  


I liked this dish, it was a nice hearty, weeknight dinner.  Perfect for this time of year when the low tonight is supposed to be in the single digits. I did think that it was a bit underseasoned the way that recipe called for, but with a bit extra salt and pepper, it perked right up.   The green beans were a simple easy side that packed a lot of flavor, and it was a good accompaniment to the beef, so thanks Liz for a good pick, and be sure to check out the blogroll to see what everyone else did with their dishes!

Tuesday, November 23, 2010

Red Velvet Cupcakes


Myself and another co-worker usually make the desserts for the birthday celebrations at work.  For a particular birthday, I had a request for Red Velvet Cupcakes.  I had never made Red Velvet Cupcakes, so I wanted to make sure I had a good recipe.  I decided to try a recipe I found over at Simply Recipes.  Elise has such wonderful recipes, and I love her descriptions of the food she cooks.  This particular recipe was from a guest blogger named Garret McCord.  He has his own website called Vanilla Garlic.  I recommend checking out both Garret's and Elise's websites.  You will find wonderful recipes at both sites.

Red Velvet Cake is quite interesting.  It is basically a white cake that has just a touch of cocoa powder added to the batter.  It gives the cake a nice, subtle chocolate flavor, kind of like the hot cocoa I used to have as a kid. The cake is also called Red Velvet due to the copious amounts of red food coloring added to the batter.  I actually cut back on some of the food coloring because the batter began to be so red, I didn't think it needed anymore.  I also have included my recipe for Cream Cheese Frosting, which is the typical accompaniment to Red Velvet Cake.  This was a good recipe.  I recommend it if you are planning on making some Red Velvet Cupcakes in the future.


Red Velvet Cupcakes
makes about 24-30 cupcakes (depending on how high you fill your cupcake molds)

  • 1 1/2 cups of sugar
  • 1/2 cup (1 stick) of butter, room temperature
  • 2 eggs, room temperature
  • 2 1/3 cups of cake flour
  • 2 tablespoons of Dutch-processed cocoa powder
  • 1 teaspoon of baking soda
  • 1 teaspoon of baking powder
  • 1/2 teaspoon of salt
  • 1 cup of buttermilk (I used low-fat)
  • 1 tablespoon of red food coloring (original recipe calls for 1 1/2 tbsp)
  • 1 teaspoon of vanilla extract
  • 1 teaspoon of distilled white vinegar


Cream Cheese Frosting

  • 8 oz cream cheese (low fat is fine), room temperature
  • 4 tablespoons butter, room temperature
  • 1-1/2 cups powdered sugar (or more if you like a sweeter frosting)
  • 1 teaspoon pure vanilla extract


For the cupcakes:


Preheat the oven to 350°F. Beat the butter and sugar in an electric mixer for 3 minutes on medium speed until light and fluffy.  Add the eggs, one at a time, beating until each is fully incorporated. Be sure to scrape down the sides of the bowl to ensure even mixing.

In a large bowl, sift together the cake flour, cocoa powder, baking soda, baking powder, and salt. In another bowl whisk together the buttermilk, vinegar, vanilla extract, and red food coloring.  Add a fourth of the dry ingredients and mix, then add a third of the wet. Continue adding in a dry, wet, dry pattern, ending with the dry ingredients.

Scoop into cupcake papers, about 1/2 to 3/4 of the way full. Bake for 18-22 minutes or until a toothpick comes out clean. Rotate the pan after the first 15 minutes of baking to ensure even baking.  Allow to cool for a few minutes in the pan, then transfer to a wire rack to cool completely. 

For the frosting: 

Ensure that the butter and cream cheese are both fully at room temperature, otherwise you will not be able to achieve uniform, creamy frosting.  Beat the butter and cream cheese together until they are thoroughly mixed.  Next, add the vanilla extract and mix briefly to combine.  

Gradually add the powdered sugar until desired sweetness and consistency is achieved.  I like my frosting to not be overly sweet, but feel free to add more powdered sugar if that is what you like.  

Thursday, November 18, 2010

CEiMB: Cioppino


This week's pick is from Margaret of Tea and Scones.  She chose for us to make the Cioppino from So Easy: Luscious, Healthy Recipes for Every Meal of the Week by Ellie Krieger.  Cioppino is fish stew originally from San Francisco.  It is a tomato-based broth that has wine and garlic added to it.  Ellie's recipe called for a combination of scallops, shrimp, and halibut.


Unfortunately, my stew only contained scallops and halibut.  I thought I had frozen shrimp at home, but when I got home from the store with the scallops, I went  in the freezer to get out the halibut, but there was no shrimp.  So, scallop and halibut cioppino it was. 

I really liked the flavor of the broth.  It had a rich tomato taste, and I enjoyed the heat from the crushed red pepper.  I added a bit of smoked paprika as well to give the broth a hint of smoke.  I thought it was a nice touch.  I do have to say that as much as I like the broth flavor, I didn't think that flavor infused into seafood.  The seafood was a bit bland, but overall I did like the dish.  I think the broth would also be good with some pasta and some Italian sausage, but I would substitute the fish broth with beef broth.  Thanks to Margaret for hosting this week, and be sure to check out the blogroll to see what the other bloggers did this week!

Sunday, October 31, 2010

Happy Halloween: Pumpkin Cookies with Cream Cheese Icing


Autumn is my favorite time of year. I love when the leaves change color, and it starts to get cooler. I also love the baking that begins this time of year. Apples, pears, and especially pumpkin. This is the first of many recipes I plan on making this year. I wanted to make something for Halloween and these pumpkin cookies from The Joy of Baking looked delicious. These cookies are more like little cakes than cookies, light and fluffy. I changed some spices from the original recipe and reduced the sugar a bit. They are very flavorful, and the cream cheese icing is a nice balance with the cookies because it is not too sweet.

Cookies:
2 cups all purpose flour
1 1/4 teaspoons baking powder
1 teaspoon baking soda
1 teaspoon ground ginger
1/4 teaspoon ground ginger
1/8 teaspoon ground nutmeg
1 teaspoon pumpkin pie spice
1/2 teaspoon salt
2 large eggs, room temperature
1 cup plus 2T light brown sugar
1/2 cup canola oil (or other flavorless oil)
1 teaspoon pure vanilla extract
1 cup canned pumpkin puree

Cream Cheese Icing:
4 ounces room temperature cream cheese, regular of low fat
2 tablespoons unsalted butter, room temperature
1/2 cup powdered sugar
1/2 pure vanilla extract

Halloween sprinkles (optional)

Note: Instead of frosting the cookies, you could add to the batter 1 cup of chopped nuts or 1 cup of chocolate chips.

For the Cookies: Preheat oven to 325 degrees F and place oven rack in the center of the oven. Line two baking sheets with parchment paper

In a large bowl, sift or whisk together the flour, baking powder, baking soda, ground cinnamon, ground ginger, ground cloves, and salt. In the bowl of your electric mixer, or with a hand mixer, beat the eggs and sugar until light and smooth (about 2 minutes). Beat in the oil, vanilla extract, and pumpkin puree. Add the flour mixture and beat just until incorporated. Place small mounds of batter onto the prepared baking sheet, spacing about 2 inches apart. I used a 3T cookie scoop. Bake for about 15 - 18 minutes or until a toothpick inserted in the center of a cookie comes out clean. Remove from oven and transfer to a wire rack to cool completely before frosting. Place small dollops of the frosting on each cookie. Decorate with Halloween sprinkles if desired. Store uniced cookies at room temperature. Store iced cookies in the refrigerator.

For the icing: Beat the cream cheese and butter until combined. Beat in the confectioners' sugar and vanilla until the frosting is soft and creamy.

Makes about 20 cookies

Tuesday, October 26, 2010

Cinnamon Crumble Apple Pie


I love all things apple, so when my mom's work was hosting an apple pie contest, I knew that i wanted to enter.  I decided to make a version of this pie from epicurious.com.  Cinnamon and apples are a classic combination, and I liked that this version was a bit different from a traditional Dutch apple pie.  The crumb topping actually forms a crisp, sugary, cinnamon crust on top.  I thought it was delicious, and so did the customers at my mom's work, who did the voting.

I followed the recipe for the most part, but I did use a different crust.  The crust I use for every pie is Good for Almost Everything Pie Dough from Baking: From My Home to Yours by Dorie Greenspan.  It is buttery, flaky, and delicious.  It uses a combination of butter and shortening to give it great flavor and a flaky texture.  It easily comes together in a food processor, and the recipe is easy to double, so you can always freeze half of it to use at another time. 


Cinnamon Crumble Apple Pie

Crust (makes one 9-inch single crust)
  • 1 1/2 cups all-purpose floor
  • 2 T. sugar
  • 1/4 tsp salt
  • 1 1/4 sticks (10 tablespoons) very cold (or frozen) unsalted butter, cut into tablespoon-sized pieces
  • 2 1/2 T. very cold (or frozen) vegetable shortening, cut into 2 pieces
  • About 1/4 cup ice water
Filling
  • 3 1/4 pounds Granny Smith apples, peeled, cored, sliced 1/4 inch thick
  • 1/2 cup sugar
  • 2 T. all-purpose flour
  • 2 t. ground cinnamon
  • 2 T. unsalted butter, melted
Topping
  • 1 cup all purpose flour
  • 1/2 cup brown sugar
  • 1/4 cup white sugar
  • 2 tsp cinnamon
  • 1/2 tsp salt
  • 6 T. unsalted butter, cold, cut into 1/2 inch cubes

 To Make the Crust:

Put the flour, sugar, and salt in a food processor fitted with a metal blade; pulse just to combine the ingredients.  Drop in the butter and shortening and pulse just until they are cut into the flour mixture. Pulsing the machine on and off, gradually add about 3 tablespoons of water.  Then use a few long pulses to get the water into the flour.  If, after a dozen or so pulses, the dough doesn't look evenly moistened or form soft curds, pulse in as much of the remaining water as necessary so the dough will stick together when pinched. Gather the dough into a ball, flatten into a disk, and wrap in plastic wrap.  Refrigerate for at least one hour before rolling.

Roll the dough out on a floured surface or between sheets of wax paper.  If working on a floured surface, turn the dough over frequently and keep the counter floured.  Fit the dough into the pie plate, and using a pair of scissors, cut the excess dough to a 1/2 inch overhang.  Fold the dough under itself, so it hangs a bit over the edge.  Flute the edge or use a for to make a decorative edge.

To Make the Filling

 Mix all the ingredients together to coat the apples.

To Make the Topping
Blend first 5 ingredients in processor. Add chilled butter cubes; using on/off turns, cut in until mixture resembles wet sand.
Toss filling to redistribute juices; transfer to crust, mounding in center. Pack topping over and around apples. Bake pie on baking sheet until topping is golden, about 40 minutes (cover top with foil if browning too quickly). Reduce oven temperature to 350°F. Bake until apples in center are tender when pierced and filling is bubbling thickly at edges, about 45 minutes longer. Cool until warm, about 1 hour. Serve with ice cream, if desired

Thursday, October 21, 2010

CEiMB: Chicken Pot Pies with Phyllo Crust


This week's Craving Ellie in My Belly pick is from Shandy of Pastry Heaven.  She chose for us to make the Chicken Pot Pies from The Food You Crave: Luscious Recipes for a Healthy Life by Ellie Krieger.  I really wanted to try this recipe because instead of the heavy crust that usually accompanies a chicken pot pie (which I do love), this pot pie uses a phyllo dough crust.  Phyllo dough is light and crispy, and typically used in Greek dishes such as spanakopita or baklava.


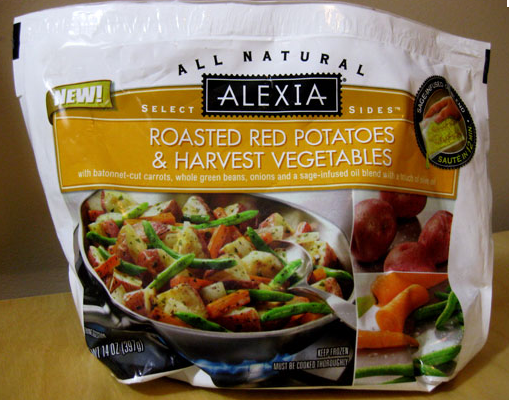
I must admit, I took a few shortcuts this week, but that is what is so great about Ellie's recipes, they are always adaptable.  Whenever I am making an Ellie recipe, I try to make the most of the ingredients I have on hand because it can get a bit expensive buying special ingredients on a weekly basis.  Fortunately, I had everything on hand for this recipe except the phyllo dough.  Instead of the vegetables called for in the recipe, I used a medley of frozen vegetables from Alexia foods.  It was a combination of roasted red potatoes, carrots, green beans, and onions in a sage broth.  I simply cooked the vegetables as directed on the package, in place of the fresh vegetables, after you cook the chicken, and before you make the broth.  I had frozen peas, so I added them at the end. I didn't have any Parmesan cheese, so I just added some fresh cracked pepper and coarse salt to the top of the phyllo crust.


I quite enjoyed this recipe.  The sauce for the chicken and vegetables wasn't too heavy, and it complimented the light crust really well. I will definitely make this again, I think the recipe lends itself to so many great combinations.  Thanks to Shandy for a great pick, and be sure to check out the blogroll to see what other CEiMB participants did with their pot pies!

Thursday, October 14, 2010

CEiMB: Apple Brown Betty


After a hectic September, and a much needed vacation I am back on track with Craving Ellie in My Belly.  This week's pick is from Jessica of Learning to Love Vegetables.  She chose for us to make the Apple Brown Betty from So Easy: Luscious, Healthy Recipes for Every Meal of the Week by Ellie Krieger.  

I had never made an Apple Brown Betty because for some reason the concept of it never seemed that appealing to me.  An Apple Brown Betty is essentially an apple crisp, but instead of an oat and flour crumble topping, the apple mixture is topped with bread crumbs.  So I am glad that this recipe is was chosen this week, and that I belong to a group like this because without it, I probably wouldn't have tried this recipe, and I am really glad that I did. Like most of Ellie's recipes, this was quick and easy to put together.  You simmer the apples in apple cider and brown sugar then place them in a pie plate, top with bread crumbs and nuts (the original recipe called for walnuts, but I used pecans because I like their flavor better than walnuts), and bake in the oven.  


I really enjoyed this.  I liked the fact that the apples were simmered in cider, it gave the dish a wonderful "Fall" feeling, and the dish wasn't overly sweet, which I think is the problem with a lot of desserts.  The sweetness usually overpowers many of the flavors, and this isn't the case with this dish.  I used Honey Crisp apples (my absolute favorite) instead of Golden Delicious. On another note, my dish only took about 25 minutes to bake instead of the 30 minutes called for in the original recipe.  I also doubled the amount of cinnamon called for in the filling because it just didn't seem like enough, and I really love cinnamon, you could smell the dish baking throughout the whole house. I would definitely make this again, and I like the "crust" that the bread crumbs formed on top of the dish.  Next time I would like to mix it up a bit.  I might try it with pears or maybe add some dried cranberries and some orange zest.  So thanks Jessica for a great pick, and be sure to check out the Craving Eliie in My Belly Blogroll to see what other bloggers did with their dish!


Sunday, September 12, 2010

Ham, Tomato, and Spinach Frittata


A frittata is basically a crustless quiche.  They are great for brunches or family breakfasts because they require minimal preparation, and you can make endless combinations.  I like to start my frittatas on the stovetop and finish in the oven.  You can add any ingredients that you would normally add to an omelet, and once the initial ingredients are softened on the stovetop, you don't have to sit and monitor the eggs, just pop it in the oven.  I made my frittata with a combination of diced ham, spinach, scallions, tomatoes and cheddar cheese, a great combination.


Ham, Tomato, and Spinach Frittata
      serves 6

  • 2 tablespoons butter
  • 10 larges eggs
  • 1/4 cup milk
  • 3/4 cup grated Cheddar cheese
  • 3/4 cup (packed) baby spinach, chopped
  • 1-2 scallions, whites and greens, thinly sliced
  • 8 oz. diced ham
  • 2-3 Roma tomatoes, sliced
  • Preheat the oven to 400 degrees.  Heat an ovenproof, nonstick skillet over medium heat and melt the 2 tablespoons of butter.  
  • Add the ham, spinach and scallions and cook until the onions are soft and the spinach is wilted, about 2-3 minutes.  
  • Meanwhile, in a medium bowl, beat the eggs with the milk and stir in the Cheddar cheese and season with salt and pepper.  Spread out the ham, spinach, and scallions mixture evenly in the pan, pour the egg mixture into the skillet and using a spatula, lift up the mixture to allow some of the eggs to flow underneath.  Place the tomatoes slices on top of the frittata.
  • Place the skillet in the oven, and cook until the frittata is puffy and golden, about 10-15 minutes.  Remove the skillet from the oven (careful, the handle will be hot), and let the frittata cool for at least 5 minutes.  Cut the frittata into six wedges and serve.