Showing posts with label Main Dish. Show all posts

Sunday, June 2, 2013

Roast Chicken with Potatoes, Lemon, and Asparagus


I can't believe it has been over a year since I have last posted a recipe!  A lot of things have happened in this past year.  I got engaged, moved all the way across the country from Cincinnati, OH, to Denver, CO, ended a postdoctoral fellowship, and started a new job. These last 3-4 months especially have been so hectic.  When I moved back to Cincinnati after graduate school, I moved into a 3 bedroom house.  After living there for 5 years, I think I tried to fill every available space because packing up that house was a monstrous job.  Fortunately, I donated and got rid of a bunch of stuff, but it still was a haul to move everything across the country.  I can't thank my dad, my uncle, and our friend Mark for driving the moving truck through breakdowns, unexpected stops in Columbia, MO, and bad weather.


This dish was one that I could make on a weeknight that wouldn't take too long to prepare, and it cooks in one dish, which makes clean up a breeze.  When I first made this, I used a whole chicken that I broke down myself, but believe me, it's much easier to just buy a chicken that is already cut up into 8 pieces.  With the lemon and asparagus, it is perfect recipe for spring/summer, make it while the asparagus is still in season, you won't regret it!


Roast Chicken with Potatoes, Lemon, and Asparagus
    adapted from Martha Stewart
    serves 4

  • 1 1/2 small new potatoes, halved or quartered if potatoes are large
  • 4 tablespoons butter cut into small pieces
  • 1 chicken cut up into 8 pieces (about 3 lbs)
  • 1 bunch of asparagus, trimmed and cut into 2-3 inch pieces
  • 1 lemon, cut into 8 wedges
  • 3 cloves of garlic, peeled and smashed
  • 1/2 tsp dried thyme
  • salt and pepper

Preheat oven to 475 degrees.  Place the potatoes and half the butter in a roasting pan (I used a 9 x 13 glass pan), scatter the garlic cloves over the potatoes and season with salt and pepper and dried thyme.  Roast the potatoes, tossing once, until the potatoes are golden, 20 to 25 minutes.

Place chicken, skin side up, on top of potatoes; season with salt and pepper.  Roast until chicken begins to brown, about 20 minutes.  

Scatter the asparagus, lemon, and remaining butter around the chicken.  Roast until the asparagus is tender and the juices on the chicken run clear, about 10-15 more minutes.  Serve chicken, vegetables, and lemon drizzled with pan juices.  

Notes:  Be sure to squeeze the lemons over the whole dish, the roasting mellows the acidity, and really brightens the dish.  

I hope to get back to posting more regularly now that I am settled into my new place.  I hope you try this dish and enjoy!


Monday, March 12, 2012

Cheddar Topped Shepherd's Pie


It's almost St. Patrick's Day, and recipes are popping up all over my favorite food blogs, and I thought this recipe for Shepherd's Pie would fit right in.  Shepherd's Pies has a meat and vegetable filling, either made with ground beef or ground lamb, which is topped with a mashed potato crust.  When I saw this recipe from Martha Stewart, I knew I wanted to try it.

This recipe is easy and made with ingredients that are usually refrigerator and pantry staples.  I only had to pick up some authentic Irish cheddar from the store, and I was able to whip this up in no time.  The only thing that takes a lot of time is all the vegetables that have to be chopped.

The only change to this recipe I made was to partially cook my ground beef before adding it to the pan.  Recently, I was lucky enough to win a contest from Serious Eats.  It was a Super Bowl contest, and the prize was 10 lbs of ground beef to use at your Super Bowl party.  The beef was shipped in 2 lbs. packages, and we only used 4 lbs. on Super Bowl Sunday, so I had 6 lbs. sitting in my freezer.  This was really high quality meat that contained a lot of fat and marbling, so if your beef has a high fat content, you may want to partially cook the meet before adding it to skillet to get rid of some of that extra fat.  If your ground beef is very lean, this step isn't necessary.

I thought this was a hearty, homey dish that is quick and easy. Next time I think I will try add some peas in the dish as well.  Happy St. Patricks Day!


Cheddar Topped Shepherd's Pie
   serves 6-8


  • 2 lbs. baking potatoes (I used Idaho Russets), peeled and thinly sliced
  • 1 tablespoon vegetable or olive oil
  • 6 medium carrots, peeled, halved and thinly sliced
  • 4 celery stalks, halved (if large) and thinly sliced
  • 1 medium onion, chopped
  • 1/2 teaspoon dried thyme
  • 1/4 cup flour
  • 1/4 cup tomato paste
  • 2 lbs. ground beef
  • 1 cup water
  • 3/4 to 1 cup whole milk
  • 1 1/2 cups shredded white cheddar cheese (I used Kerrygold Mature Cheddar)
  • kosher salt and freshly ground pepper


Preheat the oven to 450 degrees, place the potatoes in large pot and cover with salted water (about 1 inch above the potatoes).  Cook until the potatoes are fork tender, about 15-20 minutes.

Meanwhile heat a 5 quart Dutch oven, or a large heavy-bottomed pot, over medium-high heat.  Add carrots, celery, onion and thyme, season with salt and pepper. Cook, stirring occasionally, until vegetables are tender, 8 to 10 minutes. Do not brown the vegetables. Add the flour and the tomato paste, cook for at least a minute to incorporate the flour and tomato paste.  Add the beef and cook until it is no longer pink.  Add 1 cup of water and bring it to a boil, simmer 1 minute.  Pour the beef filling until a 9 x 13 baking dish.

Drain potatoes and return to the pan, cook over medium heat until the water is evaporated, about 1 minute.  Keep stirring so the potatoes do not stick to the pot.  Remove the pan from the heat and add the whole milk (start with 3/4 of a cup and add up to 1/4 cup more until the desired consistency is achieved), and 1 cup of the cheddar cheese.  Mash until the potatoes are smooth and season with salt and pepper.

Drop dollops of the mashed potatoes over the beef filling, spread to the edges of the dish with a spatula (it won't be a very thick layer, but it will puff up a bit in the oven).  Sprinkle with the remaining 1/2 cup cheese.  Bake until the topping is browned and the filling is bubbling, about 15-20 min. (Mine was ready by 15 minutes).  Let stand at least 5 minutes before serving.


Pin It

Friday, January 20, 2012

Asian Chicken and Orzo Salad


I made this pasta salad when I had a few friends over for lunch one Sunday.  It's a great dish because you can make it the night before and serve it cold or at room temperature.  I found this recipe over at the Food Network.  It's from Paula Deen if you can believe it or not, and it doesn't contain one bit of butter.  Based on the reviews I changed things from the original recipe, like I reduced the oil in the recipe and added more soy sauce and some of the other ingredients.  I thought the changes added a lot of flavor, and I really liked it.  This recipe makes a lot, so it's great for a party, light and pretty healthy too.


Asian Chicken and Orzo Salad

  • 1 cup of shelled, cooked edamame (you can cook them by blanching them in boiling, salted water for about 4-5 minutes if they aren't cooked when you purchase them)
  • 1-16 oz package of orzo, cooked and drained
  • 1 cup water chestnuts, drained and chopped
  • 3 cups diced cooked chicken
  • 2 green onions, whites and greens, sliced thin
  • 1 medium red bell pepper, diced
  • 1/4 cup canola or vegetable oil (any neutral tasting oil will work)
  • 1 tablespoon sesame oil 
  • 1/4 cup rice wine vinegar
  • 1/4 cup soy sauce
  • 2 tablespoons hoisin sauce 
  • 1 tsp Sriracha (optional)


In a large bowl, combine the orzo, chicken, edamame, green onions, and red bell pepper.  In a small bowl, whisk to combine the canola oil, sesame oil, rice wine vinegar, soy sauce, hoisin, and Sriracha.  Pour over the pasta and chicken mixture and toss to combine.  Cover and chill until ready to serve.  Can serve cold or at room temperature.

Note: When you are ready to serve, give it a taste, it may need more soy or hoisin sauce.  Mine felt a bit dried out the next day, so I drizzled some extra soy sauce  and hoisin sauce over the top, stirred to combine, and it was just great.


Pin It

Thursday, March 3, 2011

Salmon Piccata with Roasted Broccoli


I wanted to post this recipe earlier, but a trip to beautiful Banff, Alberta (see pictures below), and an unexpected surgery prevented me from doing that.  This recipe is one of my favorite, and although I usually use it with chicken, which is what the original recipe calls for, I made it with salmon this time, and it is equally, if not more delicious.  

This is a basic recipe for Salmon Picatta in which salmon fillets are dredged in flour, then sauteed in butter and olive oil on the stove top until crisp and golden brown.  A sauce is then made in the same pan with broth, lemon juice, capers and parsley.  I love capers, anytime I see a recipe with them in it, I always take notice.  I recommend this recipe with salmon or chicken, whichever you prefer.  I then served the salmon with lemon chive fettuccine and roasted broccoli.  I also included the recipe for the roasted broccoli with the recipe for the Salmon Picatta.


Salmon Piccata

  • 4 Salmon (about 4-5 oz each) fillets, skin on
  • Salt and freshly ground black pepper
  • All-purpose flour, for dredging
  • 4 tablespoons unsalted butter
  • 2 tablespoons extra-virgin olive oil
  • 1/4 cup fresh lemon juice
  • 1/2 cup chicken stock (or chicken broth)
  • 1/4 cup brined capers, drained and rinsed
  • 1/3 cup fresh parsley, chopped
  • Lemon wedges, for serving

Directions:

Season chicken with salt and pepper. Dredge salmon in flour and shake off excess.

In a large non-stick skillet over medium high heat, melt 2 tablespoons of butter with 2 tablespoons olive oil. When butter and oil start to sizzle, add the salmon, skin side down, to the pan and cook for 4-5 minutes. When salmon is browned, flip and cook the other side for another 3-4 minutes until the salmon is cooked through and flakes easily for a fork. Remove and transfer to plate. 

Into the pan add the lemon juice, chicken stock and capers. Return to stove and bring to boil, scraping up brown bits from the pan for extra flavor. Check for seasoning. Return all the salmon to the pan (skin side up) and simmer for 5 minutes. Remove salmon to platter. Add remaining 2 tablespoons butter to sauce and whisk vigorously, add the parsley and whisk into sauce. Pour sauce over salmon and serve with lemon wedges and roasted broccoli (see recipe below)


Roasted Broccoli


  • 4-6 cups fresh broccoli florets
  • 2-3 tablespoons olive oil
  • ¼ teaspoon crushed red pepper flakes
  • salt
Preheat oven to 400 degrees,  spread broccoli florets onto a non-stick baking pan.  Drizzle the olive oil over the broccoli and toss the florets in the olive oil.  Spread the broccoli back into an even layer on the baking sheet.  Season with salt and crushed red pepper (depending on your spice tolerance you may want to only use a pinch or so, it is up to you).

Roast the broccoli in the oven for about 20-25 minutes until the broccoli is tender with crispy brown edges.  About halfway through, toss the broccoli with a spatula and again spread back out onto an even layer on the baking sheet.  This is to prevent over or uneven browning as well as to prevent the broccoli from sticking to the pan. Serve along side the salmon.

This is a great technique that works with so many different vegetables such as cauliflower, carrots, potatoes, parsnips, brussels sprouts, the list is endless.


Thursday, February 10, 2011

CEiMB: Sesame Shrimp Fried Rice with Cabbage


It's actually my week to pick a recipe for the group over at Craving Ellie in My Belly to make.  I chose for us to make the Sesame Shrimp Fried Rice with Cabbage from from So Easy: Luscious, Healthy Recipes for Every Meal of the Week by Ellie Krieger.  I wanted to pick something that would be fast and flavorful and a great weeknight meal.  This recipe literally takes minutes to throw together.  Shrimp is a great choice for a quick meal because it cooks in just a few minutes.  This recipe begins by sauteing ginger, scallions, and shrimp in a very hot skillet, you then add in some cabbage and cook for a few minutes more, which leaves the cabbage a bit crisp without making it soggy.  You then stir-fry cold cooked brown rice and the dish is dressed with soy sauce and sesame oil.  I added a bit of chili-garlic sauce to give it a bit of kick because I thought it would go well together with the other Asian flavors.

The thing I liked the most about this dish was the different textures and how well they worked together.  You have chewy brown rice mixed with crisp cabbage and nutty sesame seeds.  I think it has a prominent ginger flavor and I like the soy and sesame flavors as well.  Next time I might at a bit of honey to balance the saltiness with a bit of sweet, I often do that when I am making teriyaki sauce.  If you like heat, I would definitely recommend adding chili-garlic sauce like I did.  This wasn't a wow dish, but it was a fast flavorful, satisfying dish that is great for a busy weeknight.  Which is what I needed because I worked over 12 hours today.  I am just glad I didn't pick a more complicated recipe.  This is what is so great about Ellie's recipe, always easy, always tasty!  Be sure to check out the CEiMB blogroll to see what other bloggers did with their dish.


Sesame Shrimp Fried Rice with Cabbage


1 tablespoon canola oil
4 scallions, white and green parts, thinly sliced
1 tablespoon peeled, grated fresh ginger
1 pound peeled, cleaned small shrimp
5 cups thinly sliced green cabbage, cut crosswise into 3-inch pieces
1 tablespoon toasted sesame oil
4 cups very cold cooked brown rice
3 tablespoons low-sodium soy sauce
2 tablespoons sesame seeds

Directions

Heat the oil in a very large nonstick skillet or wok over a high heat. Add the scallions, ginger, and shrimp and cook stirring frequently until the shrimp turn pink, about 1 1/2 minutes. Add the cabbage and continue cooking until it begins to soften, but is still somewhat crisp, about 2 minutes more. Transfer the shrimp-cabbage mixture to a bowl.
Heat the sesame oil in the same skillet or wok over a medium-high heat. Add the rice and cook stirring frequently, until heated through, about 3 minutes. Add the shrimp-cabbage mixture back to the skillet, stir in the soy sauce and sesame seeds and serve.

Thursday, January 27, 2011

CEiMB: Fettuccine with Creamy Red Pepper Sauce and Shrimp


This week's pick for Craving Ellie in My Belly is from Jessica from Learning to love vegetables.  She chose for us to make the Fettuccine with Creamy Red Pepper Sauce from The Food You Crave: Luscious Recipes for a Healthy Life by Ellie Krieger.   I knew as soon as I saw this recipe that I wanted to make it.  I love roasted red peppers in pasta sauces, and the addition of feta cheese sounded delicious. 

I made a few additions to the dish that I thought would work well the red pepper sauce.  I added some chopped spinach and crushed pepper to the sauce.  Once it was pureed, I tasted it, and it tasted too much like just a jarred red pepper, so I added a few tablespoons of tomato paste to the sauce to add some sweetness and remove some of that "jarred" flavor.  It worked perfectly. While the pasta was cooking I sauteed some shrimp seasoned with salt and pepper in some olive oil.  Once they were cooked, I added them to the pasta and sauce. 

This was another great recipe for me.  I think the additions I made really enhanced the sauce, especially the crushed red pepper and the tomato paste.  I would definitely make this again, the shrimp were wonderful with the pasta, but I think shredded chicken or Italian sausage would also work well.  Thanks Jessica for a great pick, and be sure to check out the blogroll to see what others did with their recipe!

Monday, January 17, 2011

Roasted Salmon with Honey Mustard and Dill


I can't start this post without thanking my Uncle Gary.  He went to Alaska last year and sent back some beautiful salmon that was frozen just after it was caught.  It is some of the best salmon I have ever tasted, so fresh and flavorful.  I literally made this dish in anticipation of making salads and pastas with it later in the week, but I just stood in the kitchen eating it after it came out of the oven, so I may only get one more dish out of it. 

This is a very simple, but delicious way to serve salmon.  You roast the salmon in the oven, and the salmon is covered in a honey mustard and dill sauce that keeps the salmon from drying out. I roasted a whole fillet of salmon, but you can easily use the sauce for individual portions, you may just have to cut back on the cook time.  I know it's not the most beautiful picture, but this recipe is so good and easy, I couldn't help but post it on this blog. 


Roasted Salmon with Honey Mustard and Dill

  • 1 1/4 lb salmon fillet (skin on, pin bones removed)
  • 1/4 cup Dijon mustard (I used Grey Poupon)
  • 2 T. honey
  • 1 T. mayonnaise
  • 1 t. dried dill (or 1 T. fresh dill, finely chopped)
  • 1 clove garlic, minced or pressed through a garlic press


Preheat the oven to 350 degrees F.  Cover a baking sheet with foil and coat liberally with non-stick cooking spray.  This will help with clean up and will keep the salmon from sticking to the foil.  Place the salmon fillet, skin side down, on the prepared baking sheet and season well with salt and pepper.

In a small bowl, whisk together the mustard, honey, mayonnaise, dill, and garlic.  Spoon the sauce over the whole fillet and let sit at room temperature for at least 10 minutes to let the flavors permeate into the salmon.


Roast in the oven until the mustard sauce has formed a nice crust and the fish flakes easily with a fork, about 25 minutes.  If you are using individual portions of salmon, the time may be less.  Transfer to a platter and serve (if it makes it that far, like I said, I stood in my kitchen and ate some of it right off the baking pan :) ).

Tuesday, January 11, 2011

Penne with Braised Short Ribs


I love short ribs.  They are delicious when cooked low and slow until the meat just falls off the bone, so when I saw this recipe from Giada De Laurentiis, I knew I wanted to try it.  The ribs and onions and garlic are sauteed on the stove top, then they are braised in a unique tomato sauce for a few hours in the oven.  This braising results in a rich sauce that goes great with the hearty meat.  Once you pull the short ribs out of the oven, the sauce is pureed, so even picky eaters (like my boyfriend), who don't like big chunks of tomatoes, like this sauce.  It's a great weekend meal, and perfect for those cold winter nights.

Ingredients
4 pounds beef short ribs
Kosher salt and freshly ground black pepper
1/4 cup olive oil
1 large onion, diced
3 cloves garlic, coarsely chopped
5 Roma tomatoes, cut into eighths
1 cup red wine, such as Cabernet Sauvignon
3 tablespoons Dijon mustard
2 cups low-sodium beef broth
1 pound penne pasta
1/4 cup freshly grated Parmesan
1/4 cup chopped fresh flat-leaf parsley 

Directions
Place an oven rack in the lower 1/3 of the oven. Preheat the oven to 350 degrees F. Season the ribs with salt and pepper. In a large heavy-bottomed Dutch oven or ovenproof stock pot, heat the oil over medium-high heat. In batches, add the ribs and brown on all sides, about 8 to 10 minutes. Remove the ribs and set aside. 

Add the onion and garlic and cook, stirring frequently, for 2 minutes. Add the tomatoes, wine and mustard. Bring the mixture to a boil and scrape up the brown bits that cling to the bottom of the pan with a wooden spoon. Return the ribs to the pan. Add the beef broth, cover the pan and place in the oven for 2 1/2 hours until the meat is fork-tender and falls easily from the bone. 

Remove the ribs from the cooking liquid. Using a large spoon, remove any excess fat from the surface of the cooking liquid.  Using a ladle, transfer the cooking liquid in the bowl of a food processor. Process until the mixture is smooth. Pour the sauce into a saucepan and keep warm over low heat. Remove the meat from the bones. Discard the bones. Using 2 forks, shred the meat into small pieces. Stir the shredded meat into the sauce. Season with salt and pepper, to taste. 

Bring a large pot of salted water to a boil over high heat. Add the pasta and cook until tender but still firm to the bite, stirring occasionally, about 8 to 10 minutes. Drain the pasta and place in a large serving bowl. Using a slotted spoon, remove the meat from the sauce and add to the pasta. Pour 1 cup of the sauce over the pasta. Toss well and thin out the pasta with more sauce, if needed. Sprinkle the pasta with Parmesan cheese and chopped parsley before serving.

Thursday, December 30, 2010

CEiMB: White Turkey Chili


This week's Craving Ellie in My Belly recipe was picked by Leslie of Lethally Delicious.  She chose for us to make the White Turkey Chili from from So Easy: Luscious, Healthy Recipes for Every Meal of the Week by Ellie Krieger.   This is an easy weeknight recipe that is light and fresh, which is good the week after lots and lots of Christmas indulgences.  

After looking at the recipe, I decided that I wanted my chili to be a bit heartier, so I halved all of the ingredients except for the turkey and the spices.  This made for a meatier chili with less beans, which is how I make chili normally, so I quite liked it.  I am also glad I kept the spices at that level as well, because without, the chili might have been less flavorful.  I added a jalapeno for a bit more spice, and instead of salt and pepper I used Goya Adobo with cumin, which is what I use for seasoning whenever I am cooking Mexican or Southwestern food.  I absolutely love it.  I used corn instead of hominy because that is what I had on hand.  I also would say it is imperative to add a splash of lime juice and fresh cilantro to your chili because it really brightens up the flavor.  Thanks Leslie for a great pick, I thought it was light, but comforting at the same time.  Be sure to check out the blogroll to see what the other CEiMB bloggers made.  

Thursday, December 9, 2010

CEiMB: Beef Stroganoff with Green Beans and Grainy Mustard


This week's Craving Ellie in My Belly is from Liz of The Not So Skinny Kitchen.  She chose for us to make the Beef Stroganoff recipe from from So Easy: Luscious, Healthy Recipes for Every Meal of the Week by Ellie Krieger.  It's a pretty straightforward beef stroganoff recipe in which beef is simmered in red wine and beef broth with mushrooms and onions.  At the last minute, I added some light sour cream to the gravy.  The original recipe called for some nonfat Greek yogurt, but I like the flavor and tang that the sour cream adds to the dish. The beef stroganoff is served over some egg noodles with a side of steamed green beans that have been tossed in some grainy mustard and seasoned with salt and pepper.  


I liked this dish, it was a nice hearty, weeknight dinner.  Perfect for this time of year when the low tonight is supposed to be in the single digits. I did think that it was a bit underseasoned the way that recipe called for, but with a bit extra salt and pepper, it perked right up.   The green beans were a simple easy side that packed a lot of flavor, and it was a good accompaniment to the beef, so thanks Liz for a good pick, and be sure to check out the blogroll to see what everyone else did with their dishes!

Thursday, October 21, 2010

CEiMB: Chicken Pot Pies with Phyllo Crust


This week's Craving Ellie in My Belly pick is from Shandy of Pastry Heaven.  She chose for us to make the Chicken Pot Pies from The Food You Crave: Luscious Recipes for a Healthy Life by Ellie Krieger.  I really wanted to try this recipe because instead of the heavy crust that usually accompanies a chicken pot pie (which I do love), this pot pie uses a phyllo dough crust.  Phyllo dough is light and crispy, and typically used in Greek dishes such as spanakopita or baklava.


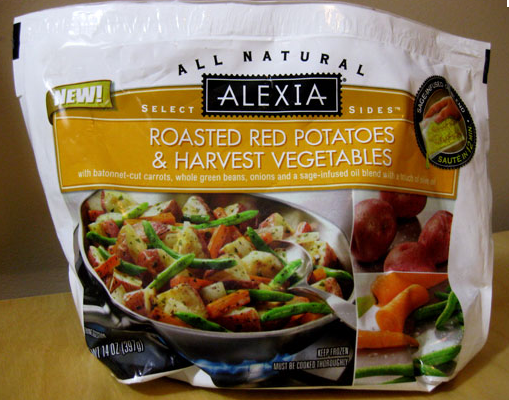
I must admit, I took a few shortcuts this week, but that is what is so great about Ellie's recipes, they are always adaptable.  Whenever I am making an Ellie recipe, I try to make the most of the ingredients I have on hand because it can get a bit expensive buying special ingredients on a weekly basis.  Fortunately, I had everything on hand for this recipe except the phyllo dough.  Instead of the vegetables called for in the recipe, I used a medley of frozen vegetables from Alexia foods.  It was a combination of roasted red potatoes, carrots, green beans, and onions in a sage broth.  I simply cooked the vegetables as directed on the package, in place of the fresh vegetables, after you cook the chicken, and before you make the broth.  I had frozen peas, so I added them at the end. I didn't have any Parmesan cheese, so I just added some fresh cracked pepper and coarse salt to the top of the phyllo crust.


I quite enjoyed this recipe.  The sauce for the chicken and vegetables wasn't too heavy, and it complimented the light crust really well. I will definitely make this again, I think the recipe lends itself to so many great combinations.  Thanks to Shandy for a great pick, and be sure to check out the blogroll to see what other CEiMB participants did with their pot pies!

Thursday, August 19, 2010

CEiMB: Salmon Cakes with Creamy Sesame-Ginger Sauce (and a giveaway)


It's my week to pick a recipe for Craving Ellie in My Belly.  I have chosen for the group to make the Salmon Cakes with Creamy Sesame-Ginger Sauce from The Food You Crave: Luscious Recipes for a Healthy Life by Ellie Krieger.  I thought this recipe would be a good alternative to your typical crab or tuna cakes, plus I loved that the ingredients had an Asian flair with lots of healthy ingredients that I enjoy.

This salmon cake combines ingredients such as water chestnuts, cilantro, and scallions.  It uses eggs and whole wheat bread crumbs as binders, and the cakes are served with a yogurt-based sauce with flavors of sesame oil, ginger, and soy sauce.

A few notes/changes to the original recipe:
  • I think that it is important not to chop your water chestnuts too finely or else you will lose that great crisp texture.  
  • Next time I may cut back on the bread crumbs because I found that the cakes did not hold together to well.  I had a hard time flipping the cakes without them falling apart.  Alternatively, I might refrigerate the cakes before adding them to the skillet so they will hold together better.  
  • I added a few tablespoons of chili-garlic sauce to the cakes to impart a bit more flavor and add a bit of heat to the cakes. 
  • For the sauce I cut way back on the amount of ginger that is in the original recipe.  Instead of 1 1/2 tablespoons ginger, I only added 1 teaspoon of fresh ginger and I still found the ginger to be quite prominent.  1 1/2 tablespoons would be way too overpowering. I also doubled the amount of soy sauce called for in the recipe, I wanted the sauce to have a bit more of a salty flavor.
  • I served my cakes on a bed of baby spinach, it went really well with the salmon cakes.
I liked the flavor of these cakes and I think that the sauce complemented them really well.  I would definitely make these again


Salmon Cakes with Creamy Sesame-Ginger Sauce  
      Yield: 6 servings (2 cakes plus 1 1/2 tablespoons sauce per serving)
  • 6 slices whole-wheat sandwich bread
  • 2 (15-ounce) cans salmon, drained, skin and bones removed (I used boneless, skinless cans of salmon)
  • 2 eggs, lightly beaten
  • 5 scallions
  • 1/2 cup finely chopped canned water chestnuts
  • 1/4 cup finely chopped fresh cilantro leaves
  • 1/2 teaspoon freshly ground black pepper
  • 3 teaspoons olive oil, divided
  • 2 tablespoons Chili-Garlic sauce (optional)
  • Creamy Ginger-Sesame Sauce (Recipe follows)

Salmon Cakes:
  • Remove crusts from the bread, break into pieces, and process in a food processor until you get a fine bread crumb. In a large bowl, flake apart the salmon with a fork. Add the egg and mix well. Finely chop 4 of the scallions and add to the bowl. Add the water chestnuts, cilantro, pepper, and the bread crumbs and mix well. Shape the mixture into 12 patties.
  • In a large nonstick skillet, heat 1 1/2 teaspoons of olive oil over a medium heat. Add 6 patties and cook for 5 minutes on each side. Transfer the cooked patties to a plate and cover with foil to keep warm. Add the remaining 1 1/2 teaspoons olive oil to the pan, and cook the rest of the salmon cakes, 5 minutes on each side.
  • Chop the remaining 1 scallion. Serve salmon cakes with the sauce and garnish with scallion.
Sesame-Ginger Sauce:
  • 1/2 cup nonfat plain yogurt, or 6 tablespoons nonfat Greek-style yogurt
  • 2 tablespoons mayonnaise
  • 1 1/2 tablespoons freshly grated ginger (I only used 1 teaspoon)
  • 1 teaspoon toasted sesame oil
  • 1 teaspoon low-sodium soy sauce (I used 2 teaspoons)
  • If using regular yogurt place the yogurt in a strainer lined with a paper towel. Put the strainer over a bowl and place in the refrigerator to drain and thicken for 30 minutes.
  • Place drained yogurt or Greek-style yogurt into a small bowl. Add mayonnaise, ginger, sesame oil, and soy sauce. Whisk until smooth.


In addition to hosting CEiMB this week, I am also giving away an extra copy of  The Food You Crave: Luscious Recipes for a Healthy Life by Ellie Krieger.  I love this book, and I would love to be able to share it with someone else.  All you have to do is leave a comment here by Sunday, August 22 by 8pm EST telling me what is your favorite healthy recipe.  My apologies, but I can only send the book to residents of the United States and Canada. 

Thanks for checking out this post, and be sure to check out the Craving Ellie and My Belly blogroll to see what other members of the group did with this recipe.

Thursday, June 24, 2010

CEiMB: Chicken Paella with Sausage and Olives


It's Thursday! That means it is time for another Craving Ellie in My Belly recipe. This week's recipe was chosen by Margaret of Tea and Scones. She chose for us to make the Chicken Paella with Sausage and Olives from So Easy: Luscious, Healthy Recipes for Every Meal of the Week by Ellie Krieger. The recipe can be found online here.

I had never made paella before, and this recipe is a bit different as far as other recipes I have seen. Traditional paella is made is a special pan that allows the rice to form a chewy, crispy crust on the bottom. Unfortunately, I do not have one of those pans, but I think that the fact that the dish is cooked in the oven adds a nice chewy texture to the rice. For me, what makes this dish different from a common chicken and rice dish is the addition of green Spanish olives and saffron. These ingredients add an extra layer of flavor that makes the dish a little sour (olives) with floral undertones (saffron). With the addition of turmeric, it makes the rice a lovely yellow color.

Of course, like always, I made some substitutions and additions. I am finally seeing the first vegetables pop up in my garden. Earlier this week I picked a handful of sugar snap peas and a small yellow squash. I sliced the sugar snap peas and used them in place of the frozen peas called for in the recipe, which was quite lovely, they were sweet and had a great texture to them. I also sliced the squash into rounds and added that to the dish as well. Unfortunately, I don't have any tomatoes in my garden yet, and the tomatoes at my grocery store looked dreadful, so I substituted about one cup of canned diced tomatoes that I drained and added to the pan. To compensate for the extra liquid, I cut back on the chicken broth and used one 14 ounce can of chicken broth instead of the 2 1/2 cups used in the original recipe. I think that worked really well because the tomatoes added a nice sweetness that balance out the briny-ness of the olives. Finally, to give the dish an extra Spanish flair I added 1/2 teaspoon of smoked Spanish paprika.


I was quite surprised how much I liked this dish. I am not a big fan of olives, and when I do eat them, I prefer the Greek kalamata olives, not green olives. But luckily for me, I live next to a great specialty grocery store that has an olive bar, so I was able to pick up some green Spanish olives that were stuffed with red bell peppers. They were delicious. Another great recipe from Ellie. Be sure to check out Margaret's blog for the recipe as well as the Craving Ellie in My Belly blogroll to see what other bloggers did with their recipes!

Monday, May 24, 2010

Pasta with Chicken and Mixed Vegetables


In an effort to utilize the ingredients I already have on hand, I created this easy weeknight meal. Everything in this recipe, except for the rotisserie chicken, I had either in my pantry, my freezer, or my refrigerator. And I even got the rotisserie chicken on sale for $2.99, because I was at the grocery store late, and they were trying to get rid of the chickens they had roasted that day. I just went home, popped it in the fridge, and it was ready for me tomorrow.

This is a very simple meal consisting of pasta, chicken, and a mixture of frozen and fresh vegetables. It can be adapted to suit whatever may be in your freezer/fridge at that time. It's easy and comforting, and the addition of the lemon juice at the end brightens up the dish, and makes it an easy, affordable, weeknight meal.


Pasta with Chicken and Mixed Vegetables


Ingredients
  • 8 oz. short pasta (I used rotini, but penne, farfalle, or gemelli would also work well)
  • 2 tablespoons olive oil
  • 1/2 cup onion, chopped
  • 1/2 cup carrots, chopped
  • 2 cloves garlic, minced
  • 3/4 cup frozen corn
  • 1 cup frozen mixed greens ( I used Trader Joe's Greens with Envy, see below, which is a mix of broccoli, edamame, asparagus, spinach, and green beans)
  • 1 rotisserie chicken, skin and bones removed, and the chicken meat shredded
  • 1/2 cup reserved pasta water
  • 1/2 cup Parmigiano-Reggiano, shredded
  • 2 tablespoons freshly squeezed lemon juice
Directions
  • In a large pot of salted, boiling water, cook the pasta according to the package directions.
  • While the pasta water is coming to a boil, in a large skillet, saute the onions and carrots in olive oil over medium-high heat until they are soft, but not browned, about 5-7 minutes.
  • Add the garlic, and saute for an additional minute.
  • Add the frozen greens and corn, season the mixture with salt and pepper. Be sure not to over salt the vegetables at this point because both the chicken broth and the cheese also add salt to the dish.
  • Once the vegetables have heated through, add the shredded chicken and chicken broth to the skillet and saute until the chicken is heated through.
  • Drain the pasta, reserving a 1/2 cup of the pasta water, and add the drained pasta and reserved water to the skillet. Stir the mixture until the pasta has absorbed some of the sauce and the sauce has thickened slightly.
  • Finish by sprinkling the pasta with the cheese and the lemon juice, stir to melt the cheese and incorporate the lemon juice.

Thursday, April 29, 2010

CEiMB: Southwestern Hash


It's Thursday! That means it is time for another Craving Ellie in My Belly recipe. This week's recipe was chosen by Melissa from It's Melissa's Kitchen. She chose for us to make the Southwestern Hash from So Easy: Luscious, Healthy Recipes for Every Meal of the Week by Ellie Krieger.

I really changed this one up a bit. First off, I wanted to make this a dinner rather than a breakfast meal, so I eliminated the eggs, and instead, added some Habenero and Green Chile Chicken Sausage to the hash. I also substituted a poblano pepper for the green pepper in the recipe because I think poblano peppers have such better flavor than plain ol' green bell peppers. I upped the amount of cumin from 1/4 to 1/2 teaspoon. Cumin is one of my favorite spices, and I can't get enough of it. I also threw in some frozen corn at the same time I added the black beans. Black beans and corn are a staple for me whenever I am making a southwestern dish.

I thought this was a filling, flavorful meal. I am glad that I added the sausage and made it for dinner. It was a complete, one skillet meal, with tons of spice and flavor. Yet another great recipe from Ellie. Thanks to Melissa for picking a delicious recipe and be sure to check out the blogroll to see what other participants made!

Sunday, April 11, 2010

Rotini with Tuna and Roasted Red Pepper and Artichoke Tapenade


My pantry is getting pretty full. I tend to do that. I will buy sauces or marinades or jars of delicious concoctions, and they will sit in my cabinets while I keep buying more and more things. That has to stop, my cabinet is way too full, and my grocery bill is still way too high. That is how this dish came about. I was looking for something to throw together based on what I had on hand. You will probably be seeing a lot more of these dishes, because I have a lot of great ingredients just sitting in my cabinet waiting to be used. I made this delicious pasta dish from a few ingredients I had in my pantry, and few ingredients I had in my fridge.

Now, I have stated before how much I love Trader Joe's grocery store, and I had a jar of their Roasted Red Pepper and Artichoke Tapenade (see picture below), so I decided to base a meal around that. I also had some Tomato Pesto tuna (see picture below) and some fresh tomatoes and basil. I made a sauce from those ingredients and served it over whole wheat pasta. It's a very healthy dish that comes together quickly if you have all the ingredients on hand. Now, I know this recipe calls for some specialized ingredients, and if you don't live near a Trader Joe's, you could probably use some roasted red peppers and some marinated artichokes in place of the tapenade. But hopefully you do live near a Trader Joe's because it is a wonderful grocery store.


Rotini with Tuna and Roasted Red Pepper and Artichoke Tapenade
serves 4

Ingredients
  • 2 tablespoons olive oil
  • 1/2 medium onion, chopped
  • 2 garlic cloves, minced
  • 2 medium tomatoes, seeded and chopped
  • 1-10 oz jar Trader Joe's Roasted Red Pepper and Artichoke Tapenade
  • 3/4 cup chicken broth
  • 1-4 oz pouch of Starkist Tomato Pesto flavored tuna
  • 10 oz. whole wheat rotini
  • 2 tablespoons fresh basil, chopped

Directions
  • In a large pot of boiling salted water, cook the pasta according to directions on the box, however, make sure the pasta is al dente because we will finish cooking the pasta in the sauce.
  • While the pasta is boiling make the sauce. Add the olive oil to a pan that has been heated to medium-high, toss in the onions and cook until the onions are soft, but not browned, about 4-5 minutes. Add the garlic and saute a few more minutes until the garlic is fragrant. Be sure not to burn the garlic, as it will turn bitter.
  • Once the onions and garlic are cooked, add the tapenade, tomatoes, chicken broth, and tuna. Cook until the sauce is simmering and everything is heated through.
  • Drain the pasta and add to the sauce, toss everything together and simmer for a few minutes until the pasta has absorbed some of the sauce.
  • Season to taste with salt and pepper. I only needed to add pepper because the tuna, tapenade, and chicken broth all contained salt.
  • Divide amongst four bowls and top with fresh basil. Serve immediately.


Thursday, April 8, 2010

CEiMB: Garlic Basil Shrimp


This week's pick for Craving Ellie in My Belly is from Margaret of Tea and Scones. She chose for us to make the Garlic and Basil Shrimp from So Easy: Luscious, Healthy Recipes for Every Meal of the Week by Ellie Krieger.

I loved this dish. It was extremely easy and delicious. I mean, the whole dish takes about 10 minutes start to finish. The dish has a wonderful balance of flavors, the heat of the crushed red pepper is a good contrast to the sweetness of the shrimp, tomatoes, and wine. I used some vine ripened tomatoes I found at the grocery store instead of the grape tomatoes. I also made some toasted bread with olive oil to soak up the wine sauce. I will definitely make this again, it is so easy. A great weeknight meal. Be sure to check out the Craving Ellie in My Belly website to see what other bloggers did.

Monday, April 5, 2010

Chicken Stir-fry in a Thai Red Curry Sauce


When I lived in Chicago, I lived in an area surrounded by Thai and Vietnamese restaurants. I must have eaten Thai once a week. Now, back in my hometown, a suburb of Cincinnati, it isn't as easy to find that cuisine. Fortunately, I live by a wonderful grocery store, Jungle Jim's, that is full of many ingredients from all over the world. There is a whole aisle devoted to ingredients from Thailand. Therefore, I decided to make this Chicken Stir-fry that is cooked in a Thai Red Curry sauce. It is similar to the Chicken Teriyaki Stir-fry I made previously, with just a different combination of flavors.

I make a sauce of red curry paste, coconut milk, soy sauce and lime juice. I pour this sauce over a mixture of chicken and vegetables. It's a spicy sauce that is mellowed by the coconut milk. It is funny, I can't stand coconut, but I love Thai cuisine that includes coconut milk in almost every dish. It is important to serve this stir-fry over rice because the recipe makes a lot of sauce, and the sauce is quite thin, so you need to rice to soak it up.


Chicken Stir-fry in a Thai Red Curry Sauce

Red Curry Sauce:
  • 1 14-oz can light coconut milk
  • 2 to 4 Tablespoons Thai Red Curry Paste
  • 2 Tablespoons soy sauce
  • Juice from 1/2 lime
Stir-fry:
  • 3 Tablespoons olive oil, divided
  • 6 cups assorted vegetables (I used a combination of carrots, snow peas, sliced mushrooms, and water chestnuts, broccoli and bamboo shoots would also work well)
  • 1 1/2 lbs boneless, skinless chicken breasts, cut into bite size pieces
  • salt
For serving:
  • green onions, thinly sliced
  • fresh cilantro, chopped
  • additional soy sauce
  • hot cooked rice

Directions:

To make the sauce:
  • Pour the coconut milk in a medium size bowl, whisk the milk if it has separated in the can. Add the Thai Red curry paste and whisk to combine (it depends on how spicy you want your sauce, I used 4 tablespoons, but that may be too spicy for some, start with a few tablespoons and add until desired spice level is achieved, be sure to taste as you go along). Add the soy sauce and lime juice. Set aside and begin the stir-fry.
  • Note on the sauce: It really is all about personal preference. If you want it saltier, add more soy sauce, if you want more of a tart taste, add more lime juice, and if you want it spicier, add more curry paste.

To make the stir-fry:
  • Add the 1 1/2 tablespoons of the olive oil to a skillet over medium heat. First add the vegetables that take longer to cook, like the carrots, and stir-fry until tender, then add the vegetable that cook quicker, like the sugar snap peas, mushrooms, and water chestnuts. Season lightly with salt, and stir-fry until all the vegetables are tender. Remove vegetables from skillet and keep warm. Remember that the sauce contains soy sauce, so you don't want to salt the vegetables too heavily.
  • Next, heat the remaining 1 1/2 tablespoons in the skillet and add the chicken and stir-fry until the chicken is cooked all the way through.
  • Once the chicken is cooked return the vegetables to the skillet, and pour the sauce over the chicken and vegetables. Cook the stir-fry until it has come to a simmer, and everything is nice and hot.
  • Serve the stir-fry over hot cooked rice and top with green onions and cilantro for some fresh flavor. Also, serve with soy sauce if additional saltiness is desired.

Thursday, March 4, 2010

CEiMB: Peppercorn Au Poivre


This week's pick for Craving Ellie in My Belly is from Rachel of Rachel Hearts Food. She chose for us to make the Pork Au Poivre from from The Food You Crave: Luscious Recipes for a Healthy Life by Ellie Krieger. This is a simple recipe where pork tenderloin is coated with Dijon mustard and sprinkled with a generous amount of coarse ground black pepper. The pan is then deglazed with red wine and chicken broth. I made a few changes to the recipe, unfortunately, my local grocery did not have pork tenderloin available for portioning, so I decided to go with thin cut pork loin chops. Additionally, I omitted the wine in the recipe. I didn't have an open bottle, and since I am heading out of town, I didn't want to open a new bottle for just 1/2 of a cup. Therefore, I added a 1/2 teaspoon of Dijon mustard and a pat of light butter to the pan to make the sauce more robust.

This is another winner from Ellie. The sauce is so flavorful, and the black pepper adds a nice heat that burns subtly in the back of your throat. The pork is light and moist, and I added the pork back to the sauce at the end to rewarm the pork to impart more flavor of the sauce into the pork itself. I will be making this again, and I would love to try the sauce with chicken as well. I served my pork with brown rice and roasted vegetable for a delicious, healthy meal.

Thanks again to Rachel, and be sure to check out the Craving Ellie in My Belly blogroll to see what other bloggers did with their recipe.

Tuesday, March 2, 2010

Jerk-Rubbed Catfish with Spicy Cilantro Slaw


I was looking for a light and flavorful dish to cook for a easy weeknight dinner when I came across this recipe for Jerk-Rubbed Catfish with Spicy Cilantro Slaw in the March 2010 edition of Cooking Light Magazine. This recipe is extremely simple, I think it took me 15 minutes from start to finish to make this meal. My jerk seasoning was quite spicy, so it was a nice balance with the cool coleslaw. You can always omit the jalapeno that is in the slaw if you don't want too much heat. The natural sweetness of the catfish complimented the tangy coleslaw. I will definitely be making this again in the future.


Jerk-Rubbed Catfish with Spicy Cilantro Slaw (adapted from Cooking Light, March 2010)

Yield: 4 servings (serving size: 1 fillet and about 2/3 cup slaw)

Ingredients

  • 3 cups cabbage-and-carrot coleslaw mix
  • 2 tablespoons chopped fresh cilantro
  • 3 1/2 tablespoons canola mayonnaise
  • 2 tablespoons fresh lime juice
  • 1 1/2 teaspoons sugar
  • 1 to 1 1/2 teaspoons finely chopped jalapeno pepper
  • Cooking spray
  • 4 (6-ounce) catfish fillets
  • 4 teaspoons Jamaican jerk seasoning

Preparation

1. Combine first 6 ingredients in a medium bowl; toss well to coat.

2. Heat a grill pan over medium-high heat. Coat pan with cooking spray. Sprinkle fish evenly with jerk seasoning. Add fish to pan; cook 3 minutes on each side or until desired degree of doneness. Remove from heat; serve fish with slaw